
This project was SOOOO fun to do. If I can do it....anyone can. I should have taken a few more photos of the before painting. But I'll try and describe what I did.
This painting need came about because I had a huge empty space above our bed in our bedroom. We have huge vaulted 12 ft. ceilings in our bedroom and it was in desperate need of some artwork. Husband and I looked around for a few months but nothing really worked. I had redone an antique cabinet in a distressed turquoise blue and wanted something with a bit of blue in it. I have soft black furniture and thought yellow as an accent color was happy.
Off I went to Michaels in search of a canvas for cheap. And wow! I came up big. In the clearance area at the front of the story, I found this baby. Not sure how big it is....wish I had measured. Anyway. This was one was discounted from $80 something to $16 because it had a tiny amount of mold on the back of the canvas. No problem for me. It just took a little bleach treatment and it was good as new.
The first thing I did was find a good tutorial online that took me step-by-step through the setup process. I basically measured out a rule of thirds grid and drew in the outline of the tree. So easy. Then I began the painting.
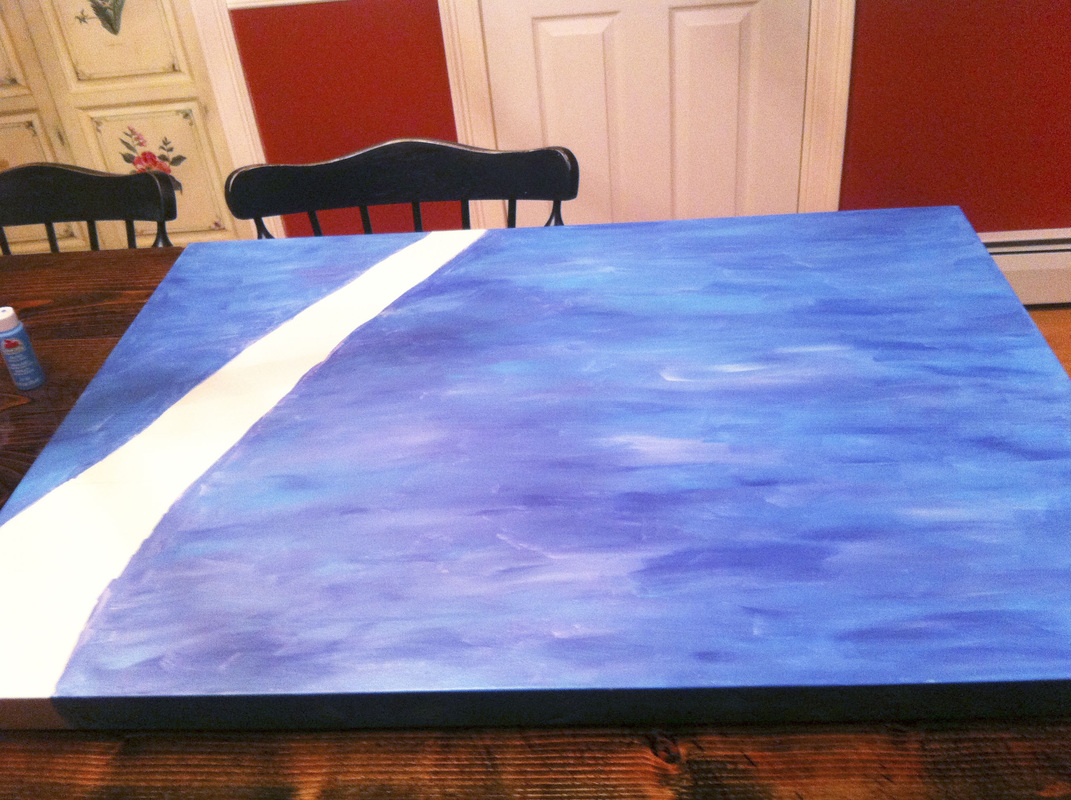
Step 1- Layer on the sky background. I used three different blues. One was medium, one was light and one had a purple tint to it. I also used some white. There is no real system for this. I put a medium base down with a regular old paint brush and then kept adding strokes of the other colors and blended them in. I was very skeptical at this point. I wasn't totally sure what I was doing. It looked more like an monet-esque ocean at this point. I know, it could be an octopus leg jutting out from the bottom left corner, but I assure you it's supposed to be the trunk of a birch tree. The more uncomfortable I was, the more I thought I was probably doing it right.
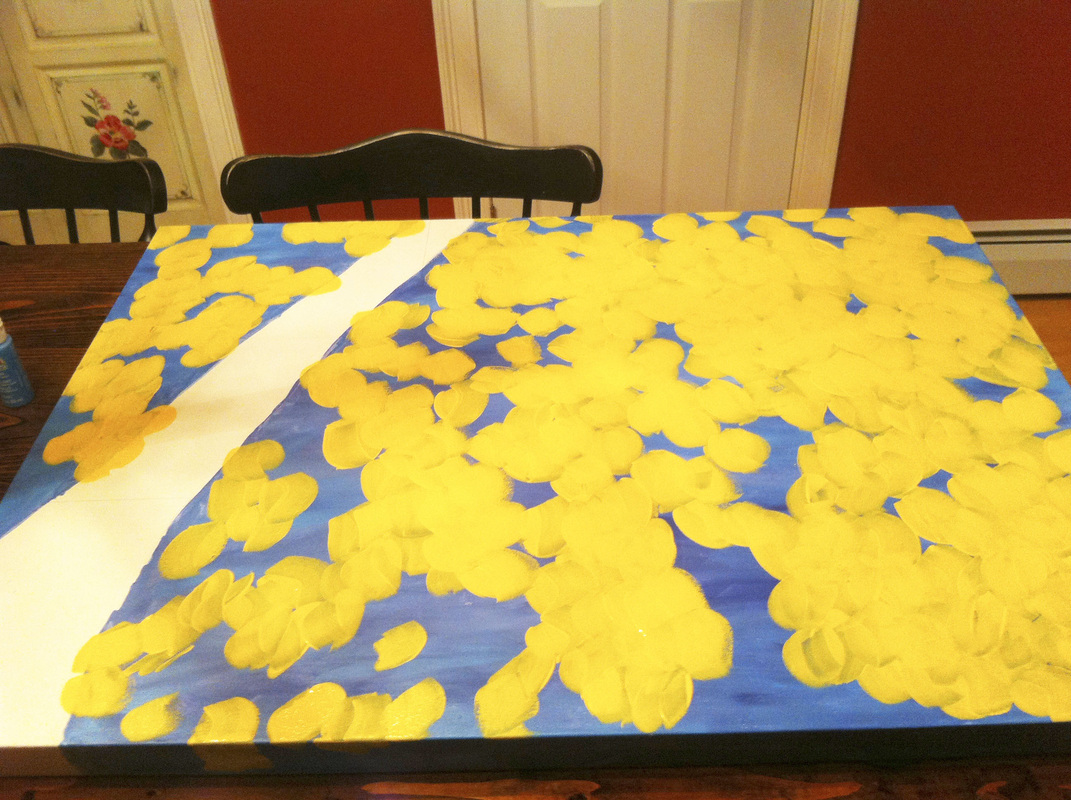
Yellow blob-like leaves are happening here.
Step 2 - This was where I started to paint on the leaves. I am sure there is some sort of technique I should have followed in terms of brush strokes. I didn't follow any. I took a 1" brush and dipped it into the yellow and then did a little swirly, pull it through brush stroke. Yes, that is the official name for the leaf creation. You could probably use a sponge. The only thing is you want them to look more like individual leaves -- more so than mine.
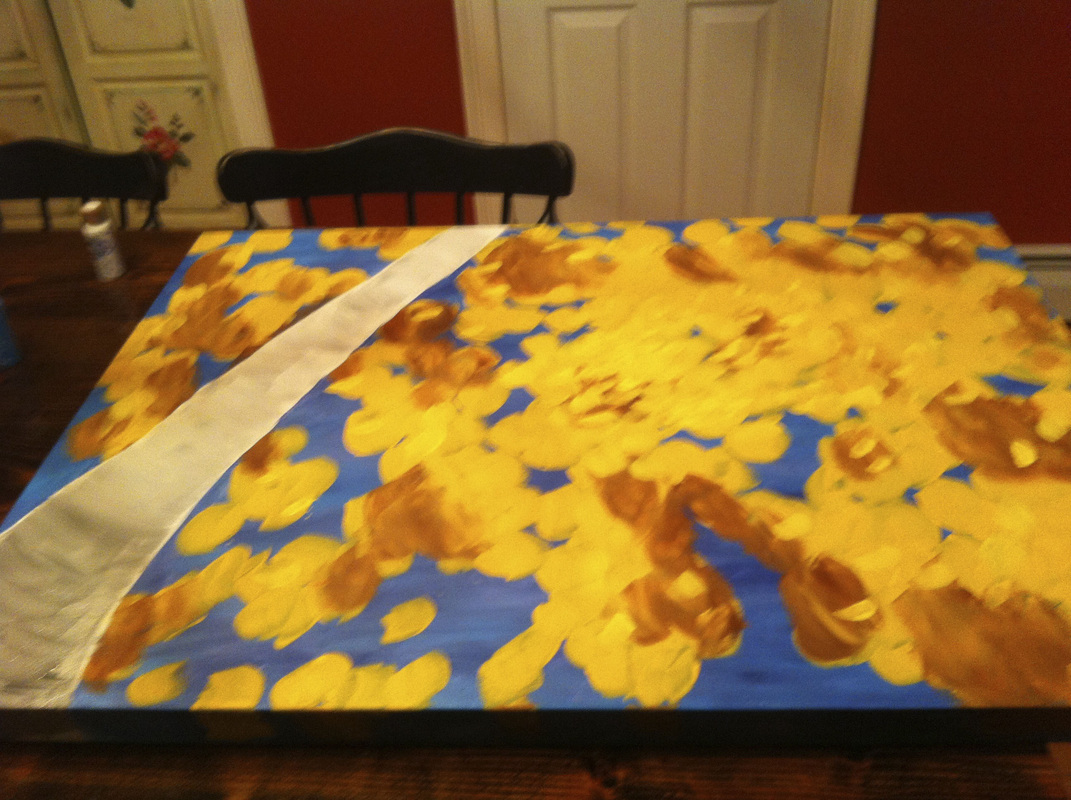
Sorry for the blurriness. Add a few brown leaves to the mix and brown smudges to the tree trunk.
Step 3 - Okay, this is the step where you layer the brown lowlights of the leaves. I know what it looks like. We will leave it at that. Just a few. Cluster a few. Also dry brush the birch tee with a little brown - not a lot. Go up the trunk a bit and do some more. It will look like some dirty smudges. That is perfect.

Add the branches and shade the tree.
Step 4 - This is when I started to get a little excited. I really studied the model because I knew I could SCREW EVERYTHING UP HERE! You need to create the branches. Even though I had covered up the grid marks, I tried to picture them on the canvas as I drew the branches. And what I discovered is that the less perfect the branches the better. Make some parts thin. Make other parts thick. Build up the dirty smudges with dry brushed black. You also need to paint in the trunks of the branches. I'm not going to lie. This is scary. You want them to look natural. It probably took me a good half hour to do this part. I wish I had known that it doesn't really matter because as you add the light and the shadow (yup, I did look those terms up on Google) it works.
Step 5 - Also now is the time to add the little sun splotches that show through the leaves. Just use some white with a small brush. Just splotch them on randomly in small clusters and one concentrated one in the middle. I know it feels awful, but this is like a Monet (not really, but....). It will look much better when viewed from afar. :)
Step 5 - Also now is the time to add the little sun splotches that show through the leaves. Just use some white with a small brush. Just splotch them on randomly in small clusters and one concentrated one in the middle. I know it feels awful, but this is like a Monet (not really, but....). It will look much better when viewed from afar. :)

Adding highlights and shadows.
Step 6 - I felt like I could really claim I was artistic after this step. You need to add some dimension to the branches. Take some white and just drag it along the tops of the branches. Do it with just a little paint. You want the branch to show through. Also add some brown shadows right under the white. Just a little bit. Add some brown to the tree trunk. The more you do -- the better it looks. The final touch is to go back and add some yellow over some of the branches to make it look more natural.
Oila!
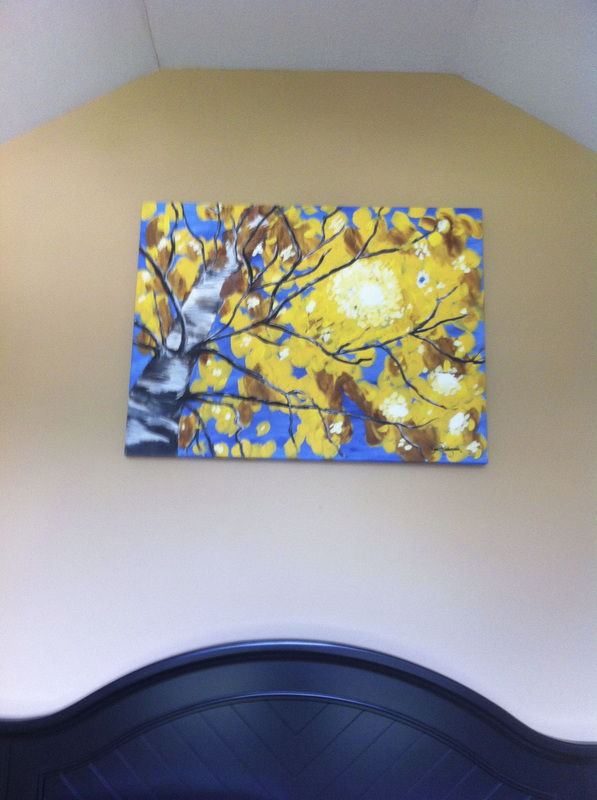
Step 7 - Hang your masterpiece! Just don't look TOO closely. And be proud of your accomplishment. I think I already to tackle another. This time it's going to include cherry blossoms. I think Pinterest has just the right one. :)
 RSS Feed